Watch the 2-minute setup
LT Roofline is a block theme for roofing contractors, roofers and gutter companies. See it live in the demo.
Section patterns (Pro)
| Pattern | Use it for |
|---|---|
| Hero with free roof inspection card | Dark hero with headline, buttons, trust points and a card listing what the free inspection covers. |
| Services grid | Eight service cards with icon tiles: repairs, replacement, flat roofs, gutters, storm damage, leak detection, chimneys and skylights, inspections. |
| How it works | Four steps from the free inspection to the final walk-through. |
| About the company | Illustration of a roofer at work, your story and a checklist. |
| Warranty and licence band | Dark band for your workmanship warranty, material warranty, licence and insurance details. |
| Materials we use | Four material cards: asphalt shingles, metal, clay and concrete tiles, flat roof membranes. |
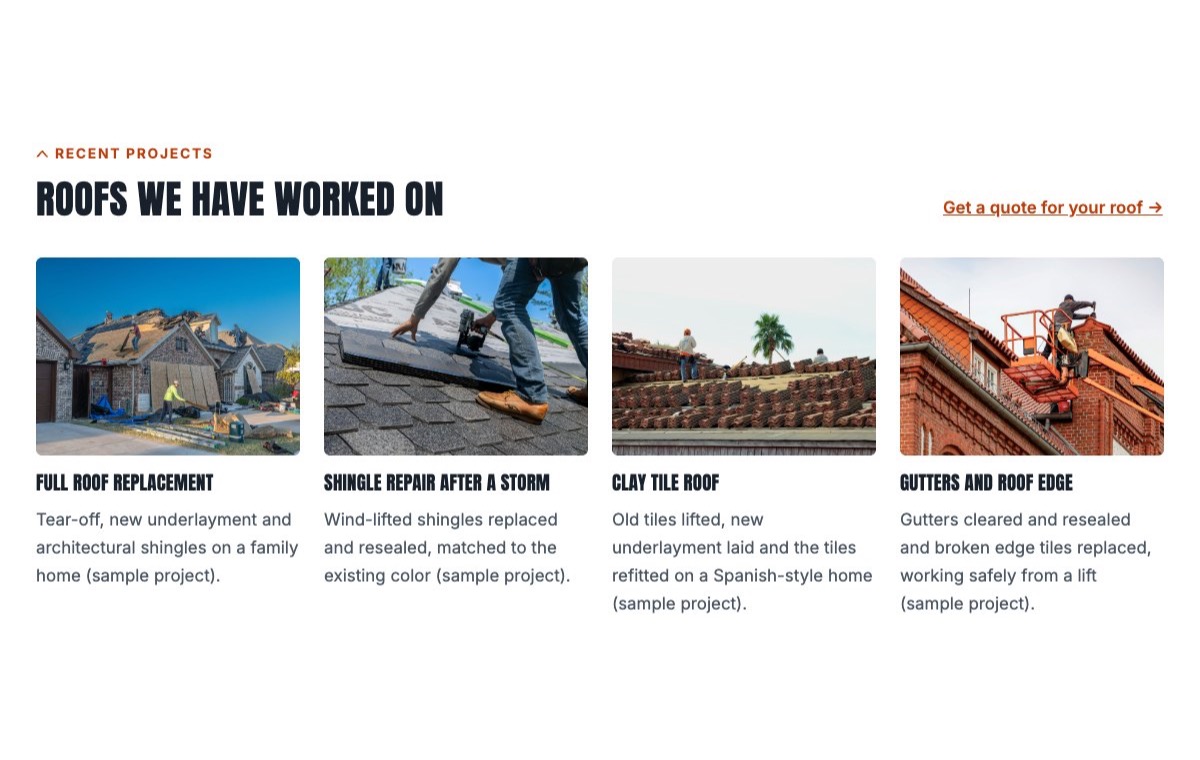
| Recent projects gallery | Four project tiles with a title and a short caption. |
| Prices and insurance claims | Example price list next to insurance-claim help and payment options. |
| Our crew | Team cards with photo, role and bio. |
| Customer reviews | Three review cards (use real reviews only). |
| Frequently asked questions | Expandable questions about cost factors, repair or replace, insurance claims and timing. |
| Service area and office hours | The towns you cover, office hours, address, phone and a map with directions. |
| Contact cards | Call, email and office address cards. |
| Storm damage banner | Highlighted strip for storm damage and urgent leaks. |
| Free inspection call to action | Orange band with inspection and phone buttons. |
Page layouts (Pro)
- Home page: the complete homepage.
- Services page: services, materials, warranty band, prices and insurance claims, storm damage banner and FAQ.
- About page: your story, how it works, crew, warranty band, recent projects and reviews.
- Contact page: contact cards, storm damage banner, service area, office hours and map.
Demo content to replace
- Phone
(555) 016-4598, email[email protected]and the Ridgeway Avenue address (header, footer, hero, contact sections). - Office hours (top bar, footer, service area) and the sample list of areas served.
- Everything marked “(sample)”: licence
No. 000000 (sample), insurance policy number, the10 years (sample)workmanship warranty, payment plan terms and project captions. - Example prices in the price list; the insurance-claim text if you do not offer that help.
- Crew names, roles and photos; sample reviews; the four project pictures.
- The “Book a free inspection” and “Request an inspection” buttons: link them to your booking page or form.
Only show licence and insurance numbers, warranty terms and certifications your company really has. Never promise that an insurance claim will be paid: say you document the damage and that the insurer decides what is covered.
Photo guide
Replace the illustrations and placeholder portraits with your own photos: select the image in the editor, then Replace. These sizes look sharp on large screens without slowing the site down.
| Image | Shape | Upload size | Tips |
|---|---|---|---|
| About photo | Landscape 5:4 | 1600 × 1280 px | Your crew at work on a roof, wearing safety gear, photographed from the ground. |
| Project photos | Landscape 4:3 | 1600 × 1200 px | Finished roofs you worked on, in daylight. Blur or remove house numbers and number plates. |
| Crew photos | Portrait 4:5 | 800 × 1000 px | Head and shoulders in work clothes, same background for everyone. |
| Map picture | Landscape 3:2 | 1600 × 1040 px | A screenshot of your service area map, or keep the illustration; the button links to Google Maps. |
| Blog featured images | Landscape 3:2 | 1600 × 1067 px | Shown on the blog cards and at the top of each post. |
| Logo (header and footer) | Wide or square | At least 200 px tall, PNG with a transparent background or SVG | Shown about 44 px tall. Set it in Appearance → Editor: select the logo block. |
| Site icon | Square | 512 × 512 px | The small icon in browser tabs. Settings → General → Site Icon. |
- Save photos as JPEG or WebP and keep each file under about 300 KB (a free tool such as squoosh.app does this).
- WordPress crops to the shape for you: select the image → Crop in the toolbar to choose which part shows.
- Fill in the Alternative text of each photo (for example “Our reception desk”) for accessibility and Google.
- Only use photos you own or have permission for. Ask clients before you publish photos of them.
Colour styles
Default (slate and safety orange), Ridge Red, Cedar Shake and Standing Seam. Try them in the live demo with the colour dots in the top bar.