LT Interiora is a block theme for interior designers, home stylists, e-design studios and kitchen and bath designers. See it live in the demo.
Watch the 2-minute setup
Section patterns (Pro)
| Pattern | Use it for |
|---|---|
| Hero with consultation card | Light hero with headline, buttons, trust points and an arched room picture with a “Book a consultation” card listing the ways you meet clients. |
| Design services grid | Eight service cards: full-service design, e-design, styling, kitchens and baths, colour, space planning, furniture and sourcing, renovation support. |
| Design process | Four steps from the first consultation to install day. |
| What every project includes | Mood board, floor plan, shopping list and styling on a dark band. |
| About the studio | Arched picture, studio story and a checklist of how you work. |
| Ways to work together | Three framed cards: e-design, styling and room refresh, full-service design. |
| Design fees | Two fee lists with dotted leaders (sample fees), the rooms you design and how fees work. |
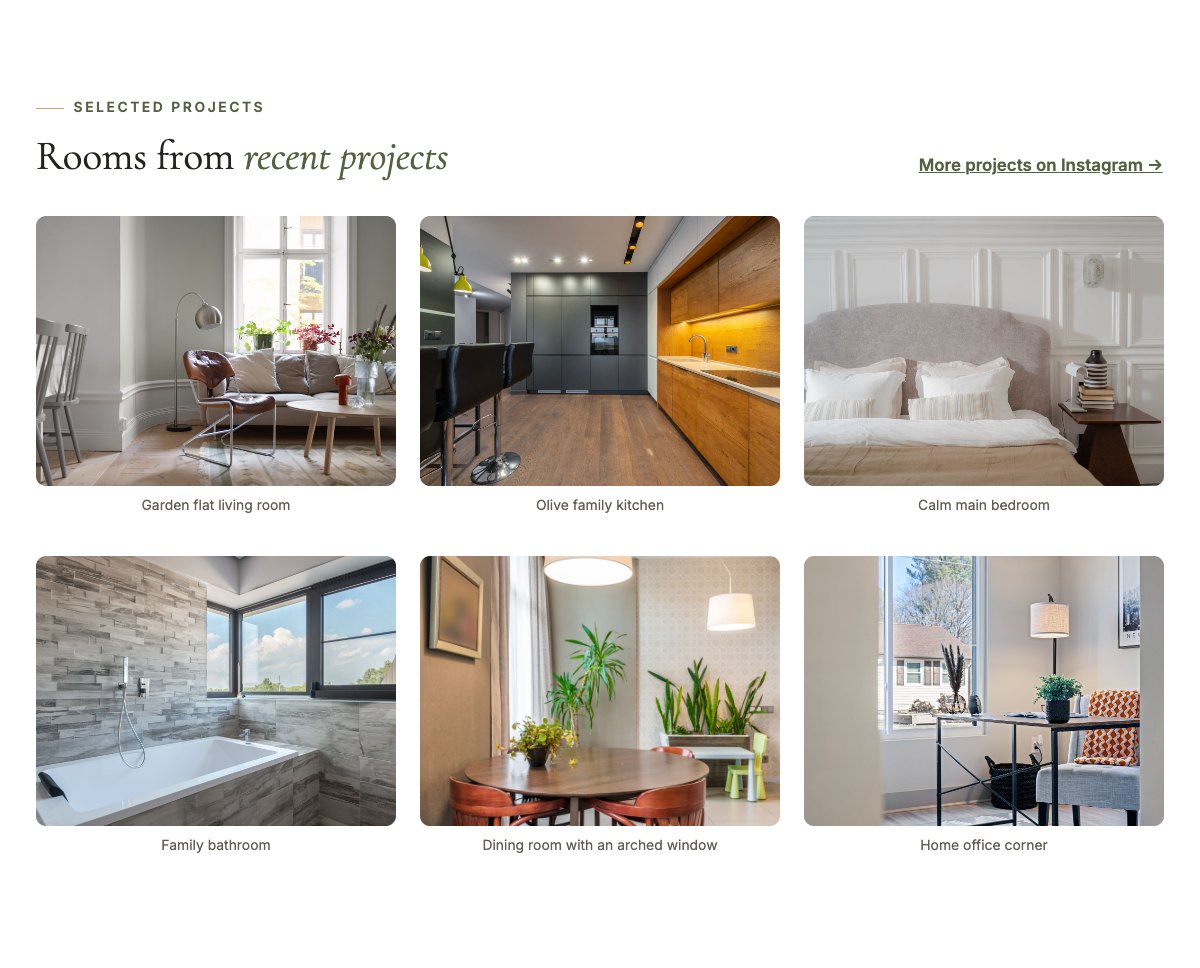
| Selected projects | Six room photos from your projects with captions and an Instagram link. |
| Before and after | The same room side by side with “Before” and “After” labels and a list of what changed. |
| Studio team | Team cards with arched photo, role and specialty. |
| Client reviews | Three review cards (use real reviews only). |
| Frequently asked questions | Fees, timelines, sourcing, existing furniture, working with builders and the area you cover. |
| Studio location | Studio hours, address, phone and a map with directions. |
| Contact cards | Call, email and visit-the-studio cards. |
| E-design banner | Brass strip that invites visitors to start with one room online. |
| Consultation call to action | Coloured band with “Book a consultation” and phone buttons. |
Page layouts (Pro)
- Home page: the complete homepage.
- Services page: design services, process, design fees, ways to work together, the e-design banner and FAQ.
- About page: studio story, what every project includes, selected projects, team and reviews.
- Contact page: contact cards, the e-design banner, studio hours and map.
Demo content to replace
- Phone
(555) 016-4455, email[email protected]and the Linden Row address (header, footer, contact sections). - Studio hours and “by appointment” (top bar, footer, studio location).
- Every fee marked “(sample)” in the design fees section and in the FAQ answer about cost. Put in your real fees, write “Quoted per project”, or remove the fees section.
- The eight services, the four process steps, what every project includes and the three ways to work together: keep only what you really offer.
- Team names, roles and photos; the six project photos; the before and after pictures and the “What changed” list; sample reviews.
- The “Book a consultation” buttons: link them to your scheduling page or enquiry form. The Instagram link: point it to your own profile.
Only show photos of your own projects, published with your clients’ permission, and real reviews. Do not mention awards, memberships, press features, statistics or guarantees (for example fixed completion dates or added property value) that your studio cannot back up.
Photo guide
Replace the illustrations and placeholder portraits with your own photos: select the image in the editor, then Replace. These sizes look sharp on large screens without slowing the site down.
| Image | Shape | Upload size | Tips |
|---|---|---|---|
| Hero room picture | Portrait 4:5, arched top | 1000 × 1250 px | Your best finished room. Keep the main piece (sofa, bed, table) in the middle: the arch trims the top corners. |
| About picture | Landscape 5:4, arched top | 1600 × 1280 px | You at work in the studio, or a table of samples and mood boards. |
| Project photos (6) | Landscape 4:3 | 1200 × 900 px | Finished rooms in daylight, shot straight on at chest height. Use the same shape for every project. |
| Before and after | Landscape 4:3 | 1200 × 900 px | The same room from the same spot, before and after. Match the angle so visitors can compare. |
| Team photos | Portrait 4:5, arched top | 800 × 1000 px | Head and shoulders with space above the head, same light and background for everyone. |
| Map picture | Landscape 3:2 | 1600 × 1040 px | A screenshot of your map, or keep the illustration; the button links to Google Maps. |
| Blog featured images | Landscape 3:2 | 1600 × 1067 px | Shown on the blog cards and at the top of each post. |
| Logo (header and footer) | Wide or square | At least 200 px tall, PNG with a transparent background or SVG | Shown about 44 px tall. Set it in Appearance → Editor: select the logo block. |
| Site icon | Square | 512 × 512 px | The small icon in browser tabs. Settings → General → Site Icon. |
- Save photos as JPEG or WebP and keep each file under about 300 KB (a free tool such as squoosh.app does this).
- WordPress crops to the shape for you: select the image → Crop in the toolbar to choose which part shows.
- Fill in the Alternative text of each photo (for example “Our reception desk”) for accessibility and Google.
- Only use photos you own or have permission for. Ask clients before you publish photos of them.
Colour styles
Default (olive and brass), Indigo Linen, Travertine and Walnut. Try them in the live demo with the colour dots in the top bar.